Add an edge node
To add a node to your project , you will be running a command line script. For this we assume you have SSH or console access to your node and are using a common shell, such as zsh or bash. Additionally, the registration script by default will need to run as sudo to register the necessary services to be automatically started after the node is rebooted.
Add nodes using the Edgeworx Portal UI or terminal commands via edgectl
Add a node using Edgeworx Cloud Portal
Get the node register script
Log into Edgeworx Cloud and select the project you want to add the node .
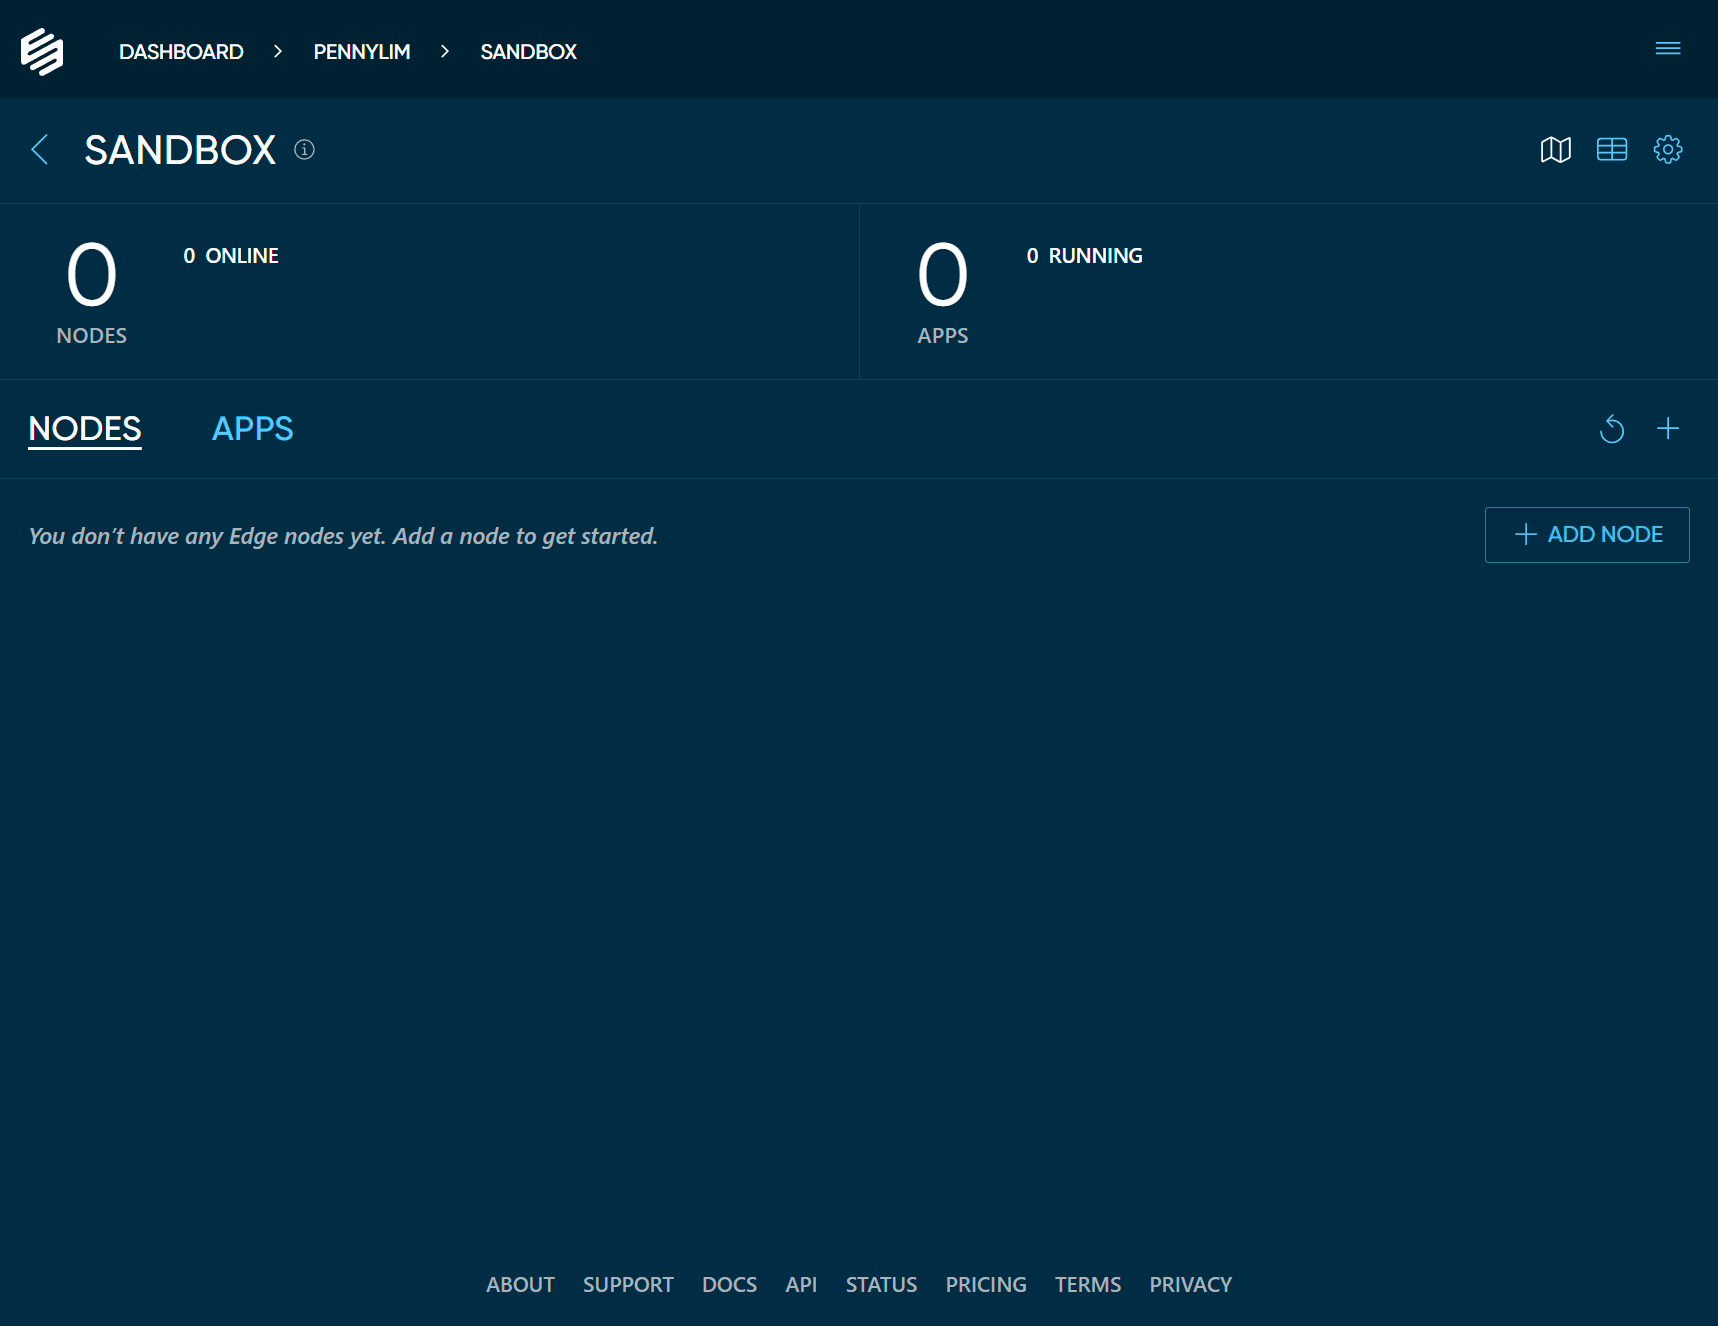
Click the + ADD NODE button. This will bring up a modal dialog which shows all the types of nodes you could add in your project.
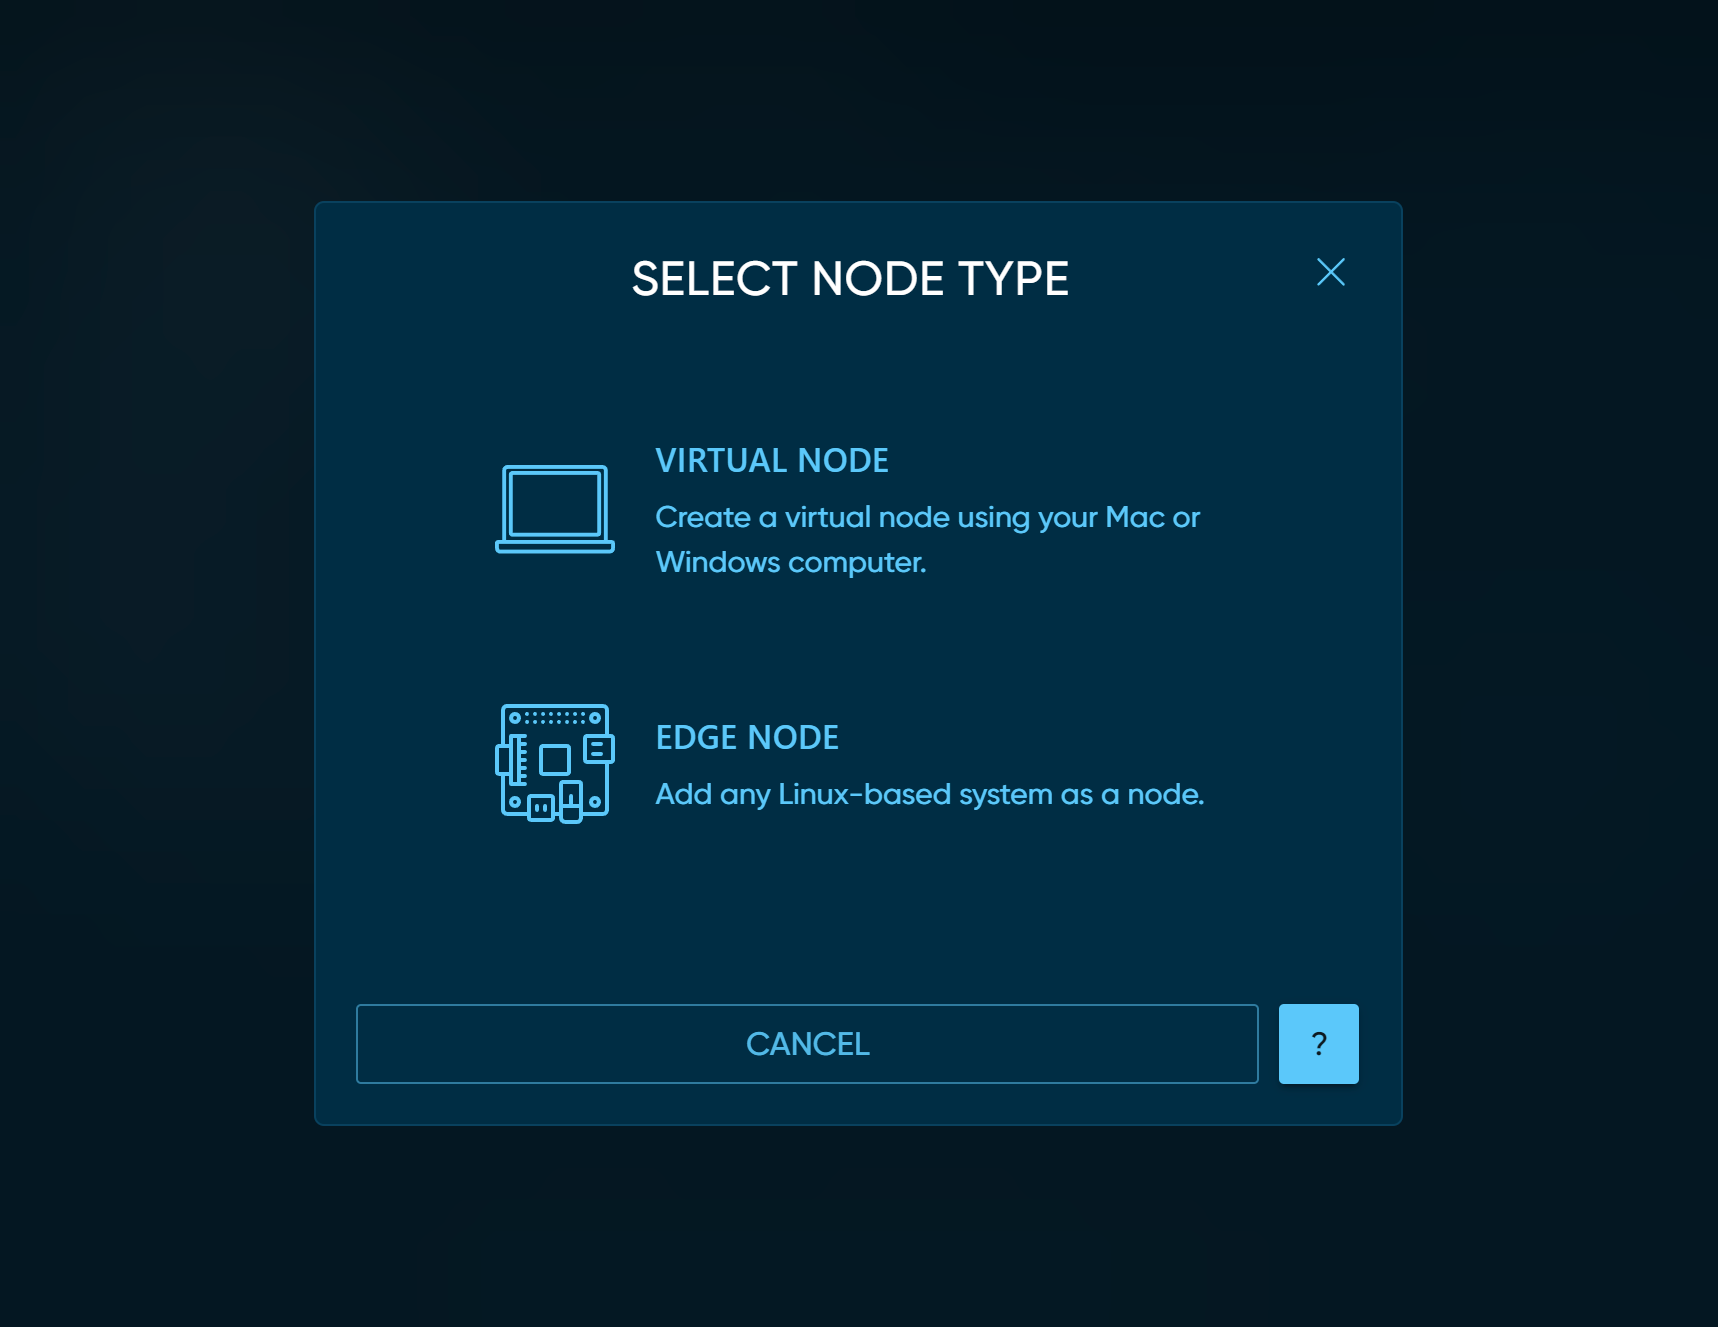
Click on EDGE NODE. This will bring up a modal dialog which shows the one line command that must be run on your
host for it to become a node in your edge project.
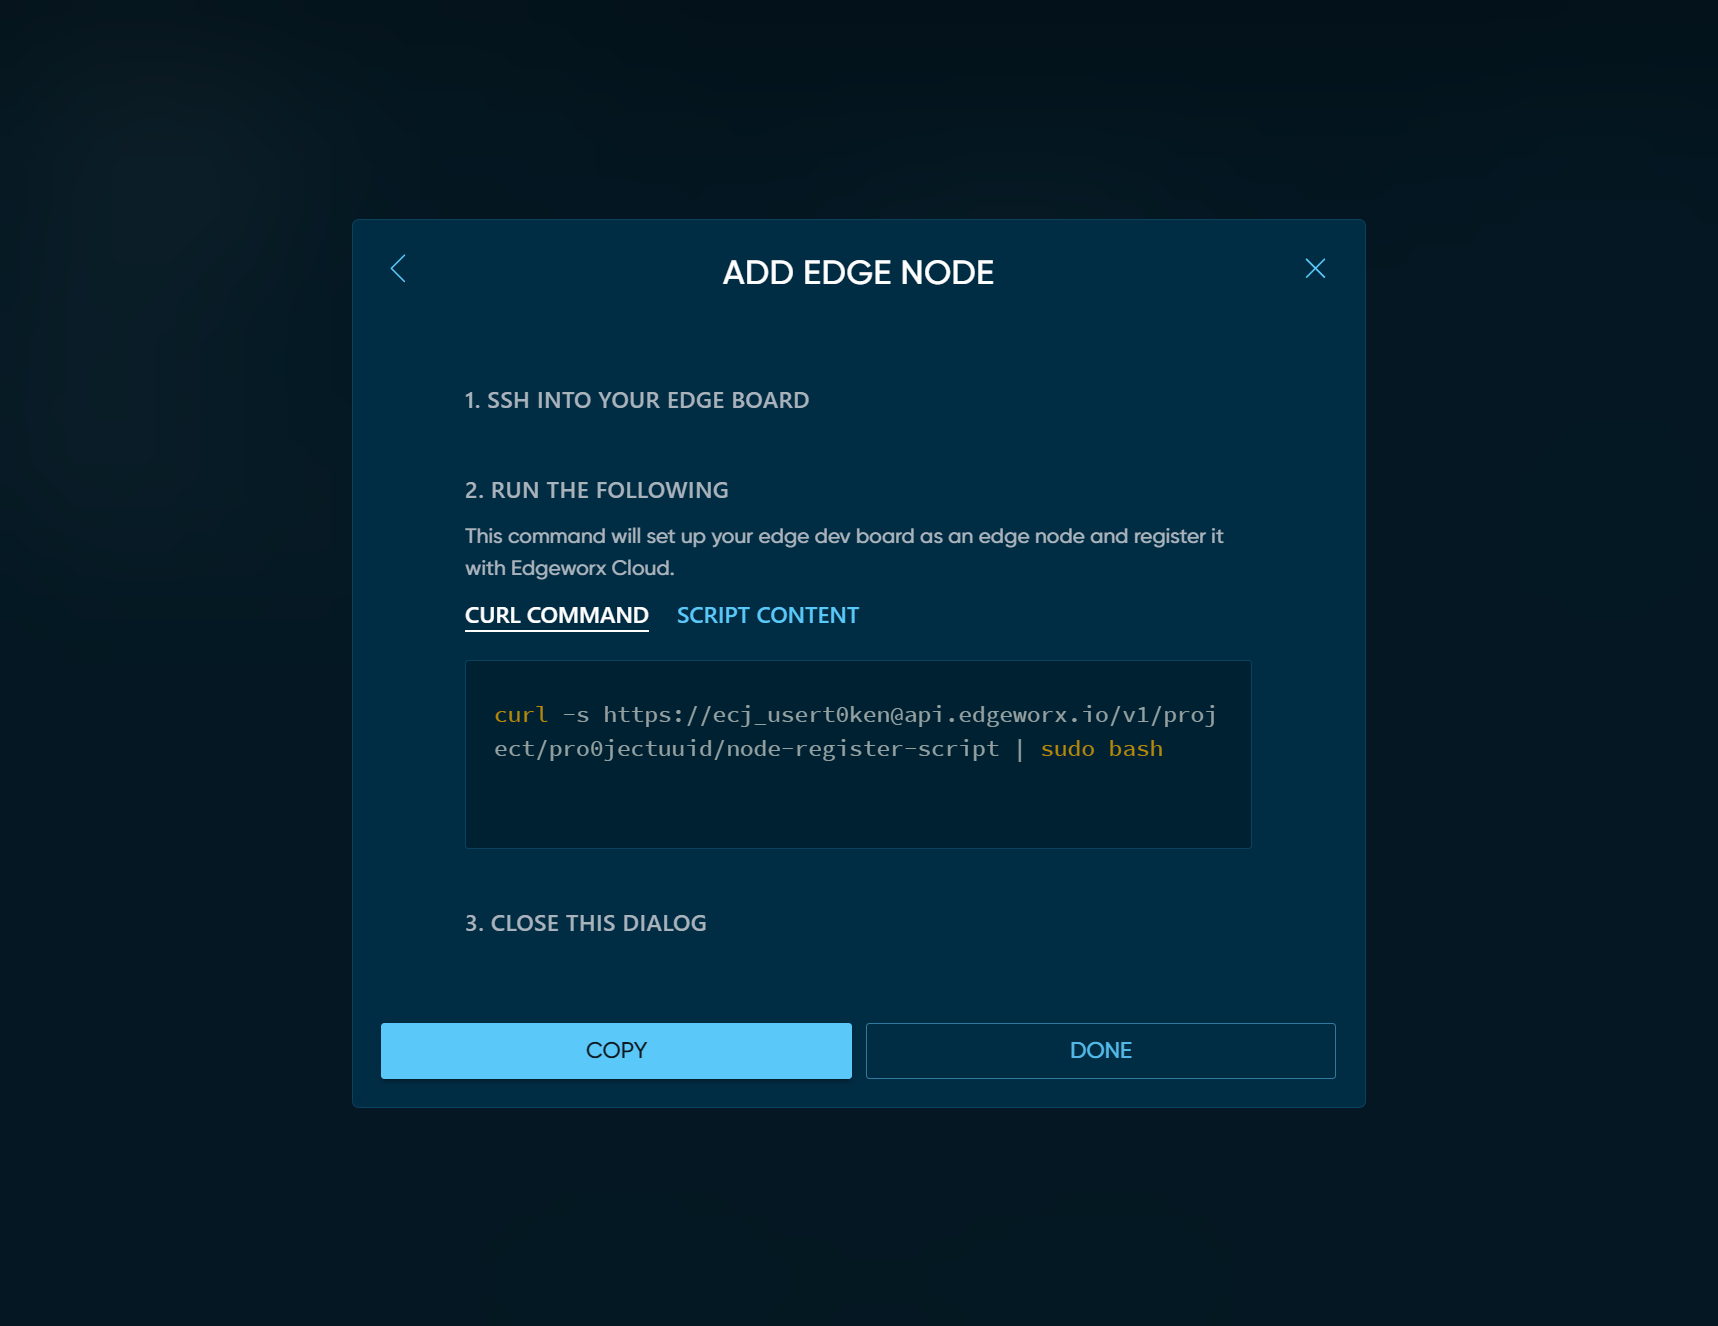
Click the COPY button to copy the install command to your clipboard.
Run the node register script
SSH into the device with sudo privileges or SSH via Cloud Portal.
Paste the register script that you copied in the previous step into your terminal. The entire install process can take up to a few minutes (depending on the spec of your node, your internet connection speed, and other dependencies).
Edgeworx_NODE_NAME="your-choice-of-name" in the node register script
as in the example below.View the node in Your Edgeworx Cloud Project
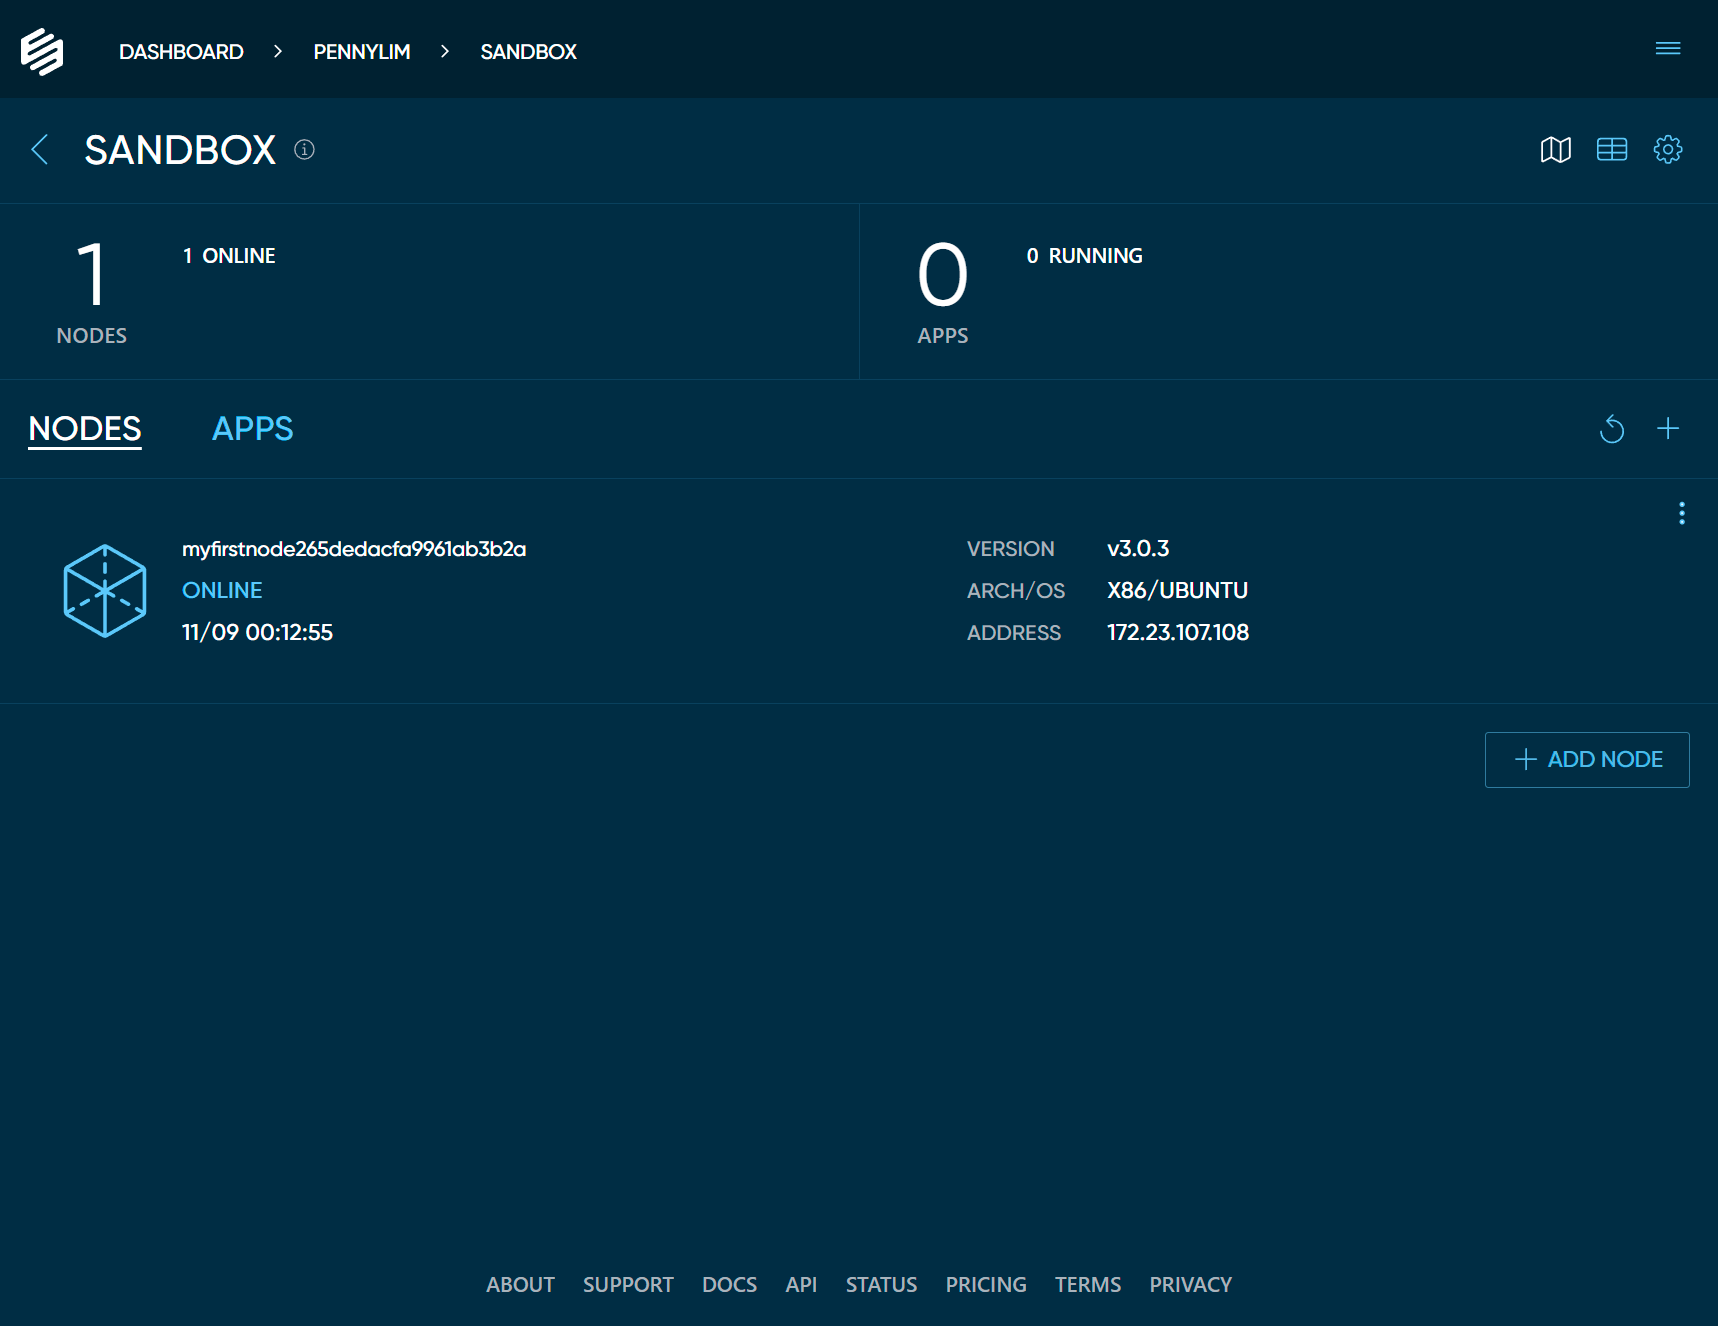
Switch back to your project and if you have not done so yet, click the DONE button in the modal dialog. You
should see your new node ONLINE in your nodes list.
Add a node using edgectl
If you do not have edgectl, open the hamburger menu in the top right of the portal and click the Get the CLI link. A modal will appear with a script Linux, MacOS, and Windows.
Once you log into your account via the CLI, set your default Org and Project and run the below command to view any nodes in the project.
edgectl login
edgectl set default org xxxxxx
edgectl set default project xxxxxx
## Replace x's with your appropriate Org and Project name
Get the node register script using the below command:
edgectl get node-register-script
We can use the output of that command on your edge devices to install Edgeworx Agent and connect to your Edgeworx Cloud Project. This command can be used any number of times on different devices to grow the respective project’s node pool.
If you wish view the raw contents of the node register script:
edgectl project node-register-script --show-script --text
This is helpful if you wish to review or debug the installation procedure.
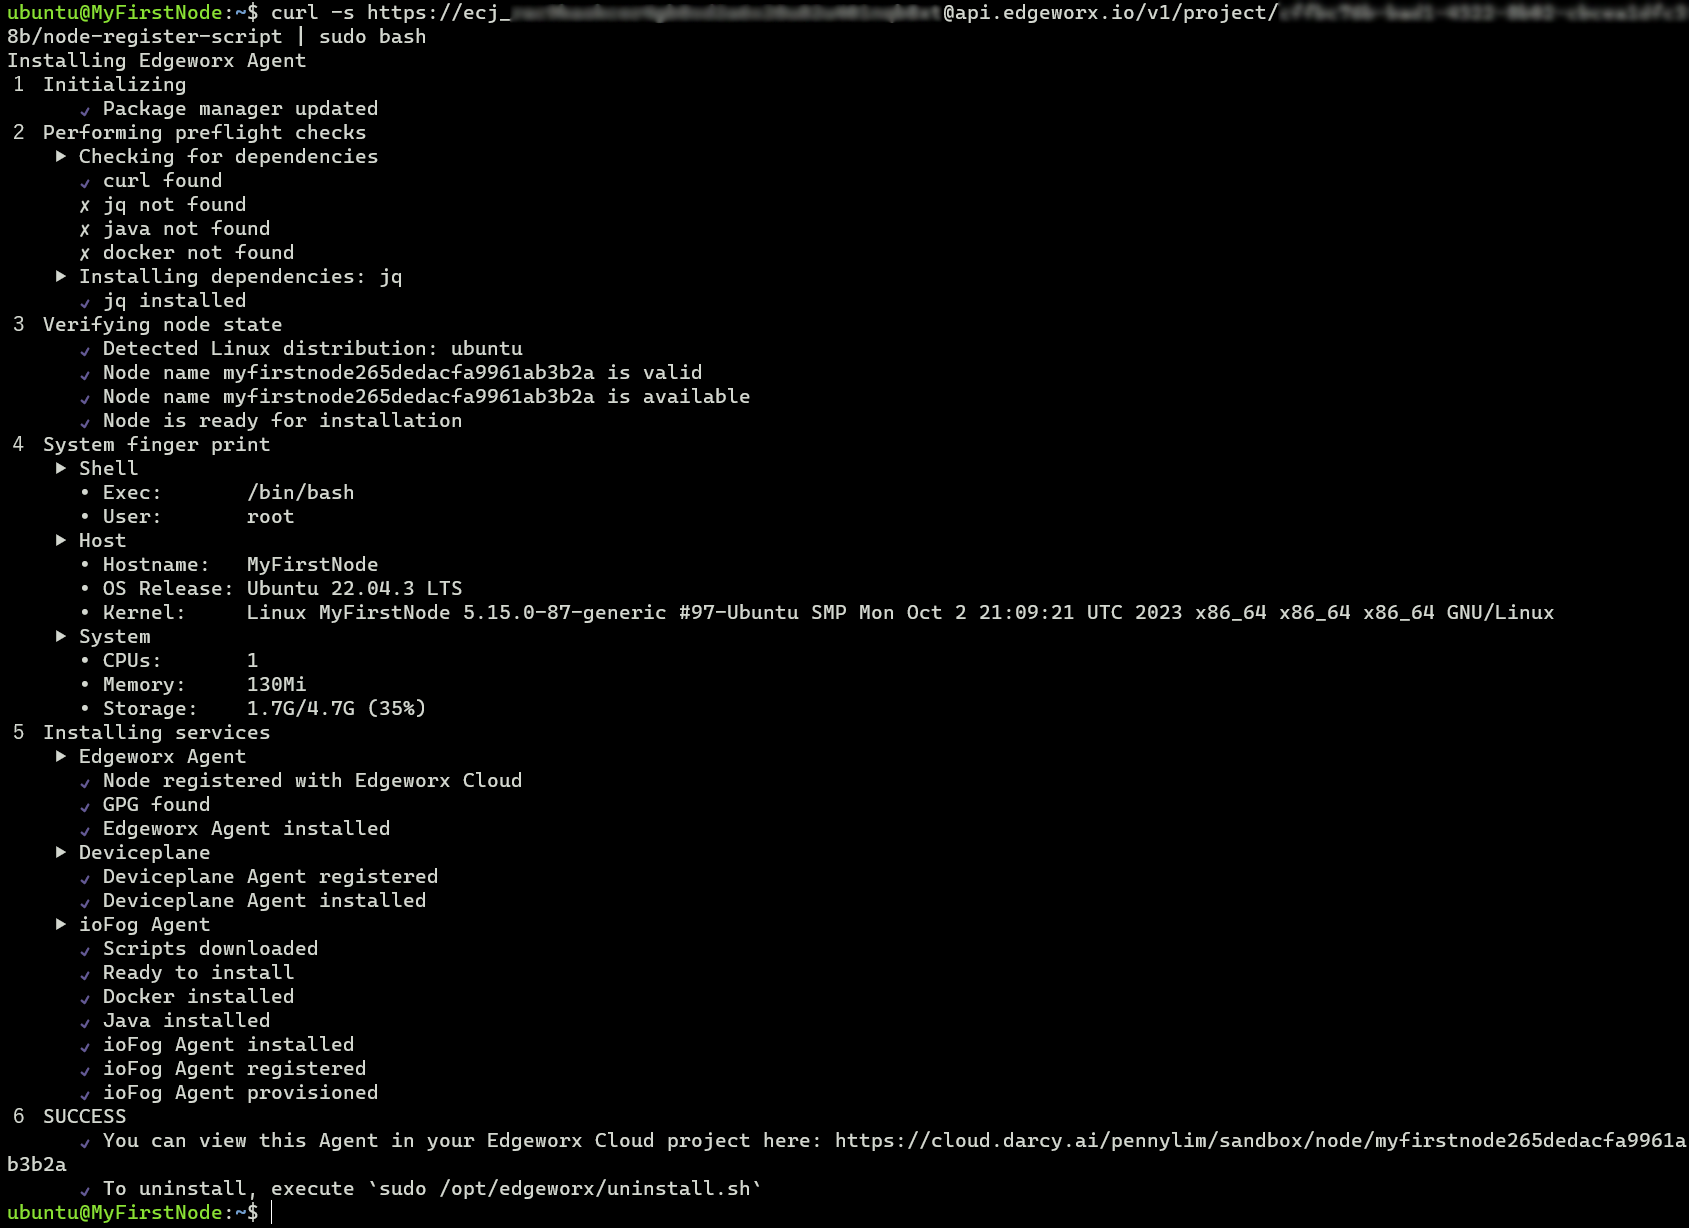
As the register script runs, you will see it’s progress as it install dependencies.
pi@raspberrypi:~ $ curl -s https://ecj_usert0ken@api.edgeworx.io/v1/project/pr0jectuuid/node-register-script | sudo bash
Installing Edgeworx Agent
1 Initializing
      ✔ Package manager updated
2 Performing preflight checks
    ▶ Checking for dependencies
      ✔ curl found
      ✘ jq not found
      ✘ java not found
      ✘ docker not found
    ▶ Installing dependencies: jq
      ✔ jq installed
3 Verifying node state
      ✔ Detected Linux distribution: ubuntu
      ✔ Node name myfirstnode265dedacfa9961ab3b2a is valid
      ✔ Node name myfirstnode265dedacfa9961ab3b2a is available
      ✔ Node is ready for installation
4 System finger print
    ▶ Shell
      ∙ Exec:       /bin/bash
      ∙ User:       root
    ▶ Host
      ∙ Hostname:   MyFirstNode
      ∙ OS Release: Ubuntu 22.04.3 LTS
      ∙ Kernel:     Linux MyFirstNode 5.15.0-87-generic #97-Ubuntu SMP Mon Oct 2 21:09:21 UTC 2023 x86_64 x86_64 x86_64 GNU/Linux
    ▶ System
      ∙ CPUs:       1
      ∙ Memory:     130Mi
      ∙ Storage:    1.7G/4.7G (35%)
5 Installing services
    ▶ Edgeworx Agent
      ✔ Node registered with Edgeworx Cloud
      ✔ GPG found
      ✔ Edgeworx Agent installed
    ▶ Deviceplane
      ✔ Deviceplane Agent registered
      ✔ Deviceplane Agent installed
    ▶ ioFog Agent
      ✔ Scripts downloaded
      ✔ Ready to install
      ✔ Docker installed
      ✔ Java installed
      ✔ ioFog Agent installed
      ✔ ioFog Agent registered
      ✔ ioFog Agent provisioned
6 SUCCESS
      ✔ You can view this Agent in your Edgeworx Cloud project here: https://cloud.darcy.ai/pennylim/sandbox/node/myfirstnode265dedacfa9961ab3b2a
      ✔ To uninstall, execute `sudo /opt/edgeworx/uninstall.sh`
Note the final two lines: The first line provides a link to view your node in the Edgeworx Cloud web portal. The final line provides a command to uninstall the software and detach the node from Edgeworx Cloud.
If the script fails during install of dependencies, the script will return that it encountered an error and present the path of a generated log file for debugging.